
Exterior painting can look great on day one and still fail early if the weather works against it. In Glen Allen, summer humidity, overnight dew, and sudden thunderstorms matter as much as color and sheen. Successful results depend on reading conditions, not just the calendar, and matching products and methods to what the surface and sky are doing. This article explains how dew point, surface temperature, substrate moisture, and application timing influence adhesion, leveling, and curing. You will also find practical ways to clean, prime, and coat siding, trim, and doors so the finish resists mildew, avoids blistering, and holds color longer.
Check Dew Point and Surface Temperature, Not Just the Air Reading
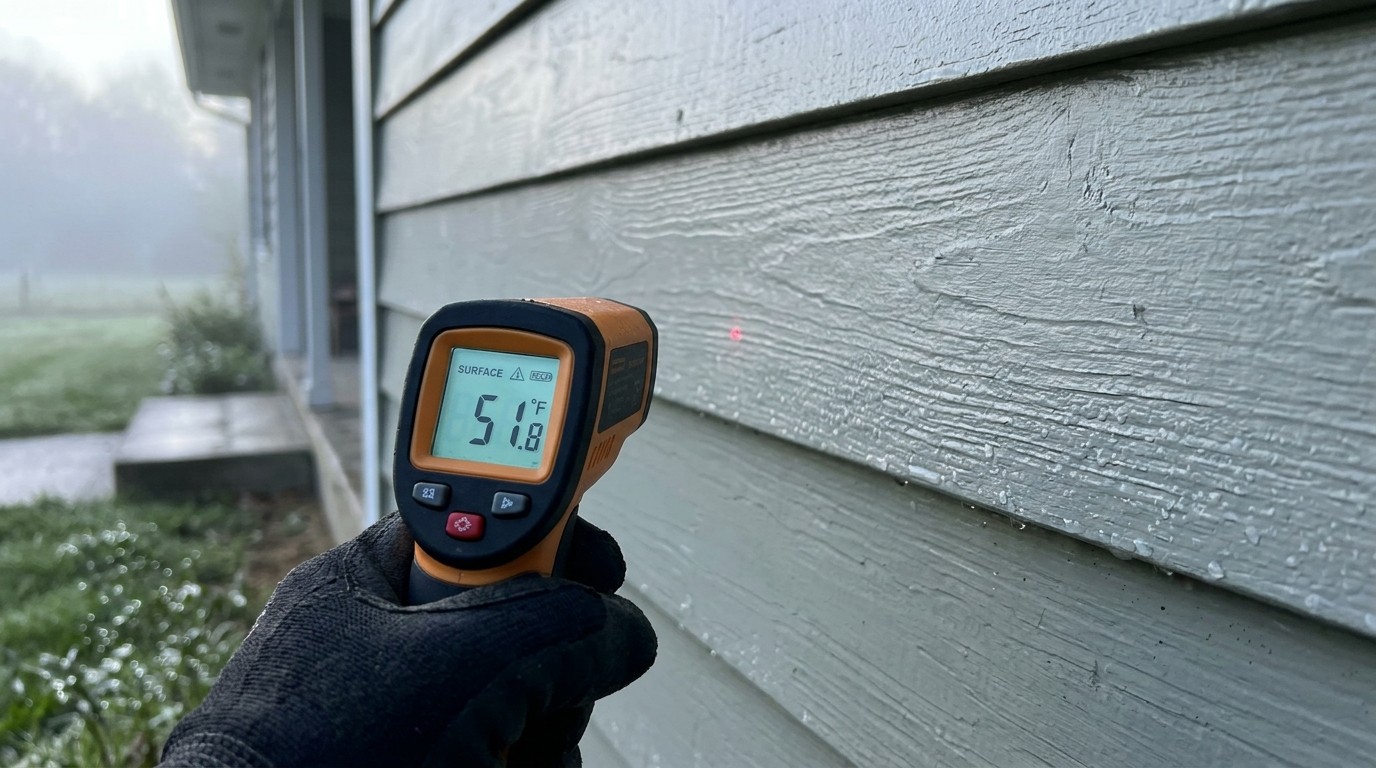
Paint cures by releasing water or solvents. If the surface is at or near the dew point, condensation forms and can interfere with that process. A common field practice is to ensure the substrate remains several degrees above the dew point before and after application. An inexpensive infrared thermometer and a hygrometer, paired with a reliable weather app, can help you check both surface temperature and dew point on the specific wall you plan to paint.
If you are unsure how to interpret those readings or stage the job around shade and sun, an experienced painting contractor in Glen Allen can plan the work around changing surface conditions and direct sunlight. For wood siding, a pin moisture meter can confirm that the substrate falls within the paint manufacturer’s specifications before priming or applying a finish coat.
Wash, Rinse, and Let Substrates Dry to Prevent Mildew and Peeling
Moisture encourages mildew growth and allows chalking to remain on the surface, both of which can weaken adhesion. Before applying primers or finish coats, clean the surface with a product suitable for exterior painted surfaces and organic growth.
Depending on the siding’s condition, this may involve a compatible exterior cleaning solution or detergent designed for painted surfaces. Follow product directions carefully and protect nearby plants, people, and surrounding materials during cleaning.
Rinse thoroughly to remove residues that could interfere with adhesion or contribute to dull streaking after damp weather. Then allow sufficient drying time, especially on shaded north elevations where airflow and sunlight are limited.
Picture a backyard where dense trees leave the siding damp until noon after a stormy night. Painting at 9 a.m. could trap moisture and increase the risk of future blistering. Proper cleaning and drying break that cycle by removing contamination and giving coatings a sound, dry surface to bond with.
Match Coatings to Conditions: Acrylics, Primers, and Mildew Resistance
Product selection is as much a weather decision as an aesthetic one. Quality 100 percent acrylic latex paints can handle Glen Allen’s seasonal changes because they remain flexible and allow some vapor movement, which can help reduce coating failure on properly prepared wood.
Where cedar or redwood is present, a primer designed to block stains can help control tannin bleed that might otherwise appear as brown discoloration through lighter colors. Knots or resinous areas may require additional spot priming with a compatible product before applying the full finish system. In shady or damp areas that have a history of mildew growth, choose an exterior coating designed for those conditions and follow the manufacturer’s recommendations.
If cool, humid weather is unavoidable, formulations intended for lower application temperatures may extend the painting season. However, products that dry quickly can reduce working time, so application technique becomes even more important when maintaining a wet edge.
Time of Day, Sun Path, and Application Method Affect Results
Application technique should follow the sun. Working in direct, intense sunlight can cause paint to dry too quickly, leaving lap marks, brush drag, or uneven appearance.
Start on walls that stay shaded during the morning, then move around the building as the sun moves. Maintain a wet edge by planning brushing, cutting, and rolling sequences. This helps fresh paint blend smoothly into adjacent sections.
On rough wood or heavily textured lap siding, spraying followed by brushing or rolling can help work the coating into pores and reduce missed areas. Select a roller nap suited to the siding profile so paint reaches grooves and textured surfaces rather than simply passing over them.
Consider a dark front door facing strong afternoon sun. Brushing it at 3 p.m. in July can cause paint to dry too quickly and show brush marks. Moving that work to a cooler part of the day and using a quality enamel designed for doors can improve leveling and appearance.
Wind also matters. Strong gusts can carry spray onto vehicles, windows, landscaping, or nearby surfaces, so schedule spraying only when conditions allow you to control the spray.
After the Last Coat: Curing, Cleanup, and Early Care
Dry to the touch is not the same as fully cured. Acrylic latex films may be dry to the touch within hours, but complete curing takes longer and depends on temperature, humidity, film thickness, and product formulation.
During that period, avoid aggressive washing, scrubbing, or placing materials tightly against freshly painted surfaces. Reinstall downspouts and splash blocks carefully so they do not direct water onto uncured paint, and adjust sprinklers to keep spray away from new coatings.
Monitor fresh caulk joints after curing. If minor shrinkage creates small gaps, address them according to the sealant and coating manufacturer’s instructions.
Keep a record of the product line, color formula, and sheen used on each area so future repairs or touchups are easier to match.
After the coating has cured per the manufacturer’s recommendations, gentle routine cleaning can help remove dust and surface contaminants without damaging the finish.

Plan Around the Weather for Better Results
Weather-conscious planning is often the difference between a paint job that looks good for one season and one that continues protecting the home for years.
Monitoring dew point and surface temperature, removing chalk and mildew, choosing compatible primers and acrylic finishes, and scheduling application around shade and sunlight can reduce the risk of blistering, uneven sheen, and lap marks.
If your property has difficult conditions such as damp areas surrounded by trees, recurring tannin bleed, or a narrow weather window, allow additional drying time and use moisture measurements when appropriate.
Thoughtful sequencing and careful post-paint maintenance give every exterior painting project a stronger start and help preserve both color and protection over time.

