
Key Takeaways
- Start with the problems that interrupt daily routines, rather than starting with decorative finishes.
- Plan the shower, flooring, lighting, and storage around the people who use the room.
- Choose moisture-resistant materials with fewer difficult-to-clean seams.
- Address ventilation, waterproofing, drainage, and hidden repairs before selecting finishes.
- Include flexible features that can make the bathroom easier to use over time.
- Budget for permits, labor, demolition, and unexpected conditions behind walls or under flooring.
A successful bathroom remodel begins with the routines that happen every day, not with a tile sample or a faucet finish. Sacramento homeowners often want a room that feels brighter, handles moisture reliably, and stays comfortable through busy mornings and warm California summers. Working with experienced Sacramento bathroom remodelers can help turn those priorities into a layout that supports both present needs and long-term use.
The best plans combine practical access, durable surfaces, good lighting, effective ventilation, and storage that keeps the floor clear. Low-maintenance choices do not eliminate cleaning, but they can reduce grout scrubbing, water spotting, clutter, and the chance that small issues become costly repairs.
Why Bathroom Planning Matters More Than Trends
A beautiful bathroom can still be frustrating if it has a cramped entry, poor shower drainage, dim vanity lighting, or no place for towels and toiletries. In Sacramento homes, where bathrooms may range from older compact layouts to recently expanded primary suites, the right solution depends on the room’s actual dimensions and the household’s habits.
Function should guide the design. A low-threshold shower, clearer walking path, drawer storage, and easy-clean wall surfaces may improve daily life more than a fashionable finish that requires frequent polishing or sealing. Planning for durable use also makes it easier to stay in the home comfortably as needs change.
Step 1: Audit How the Bathroom Works Today
Before ordering anything, use the current bathroom at different times of day and write down what does not work. Measure the room, door swing, vanity depth, toilet clearance, shower opening, and the routes people take while getting ready.
- Look for narrow pathways, awkward turns, and doors that block fixtures or cabinets.
- Notice where water splashes, puddles, or escapes the bathing area.
- Check for loose mats, cracked caulk, soft flooring, glare, and dim corners.
- List products that live on the counter because there is no logical storage space.
- Separate urgent repairs from optional appearance upgrades.
Step 2: Choose the Right Shower or Tub Setup
A bathtub, walk-in shower, low-threshold shower, or tub-to-shower conversion can all be appropriate. The best choice depends on the available space, bathing preferences, children or guests in the household, and future accessibility goals.
Questions to Ask Before Deciding
- Is the existing tub wall difficult or uncomfortable to step over?
- Would a handheld showerhead make bathing, cleaning, or assisting another person easier?
- Would a built-in or fold-down seat add useful comfort?
- Can the controls be reached before entering the spray of water?
- Will the enclosure contain splashes and direct water toward the drain?
- Would keeping at least one bathtub serve the household well?
Step 3: Select Flooring for a Wet, Busy Room
Bathroom flooring needs to withstand regular water exposure while offering confident footing. Prioritize a surface with suitable wet-area traction over an extremely glossy appearance. Matte porcelain and textured tile are common options, but homeowners should review the manufacturer’s care instructions and intended-use guidance before purchasing.
- Consider whether a smaller tile provides useful texture underfoot, while recognizing that it creates more grout joints.
- Avoid abrupt changes in floor height near the shower entrance.
- Use only mats that stay securely in place, or eliminate loose rugs that slide.
- Plan a finish that can be cleaned without specialty products or aggressive scrubbing.
Step 4: Pick Materials That Reduce Cleaning Work
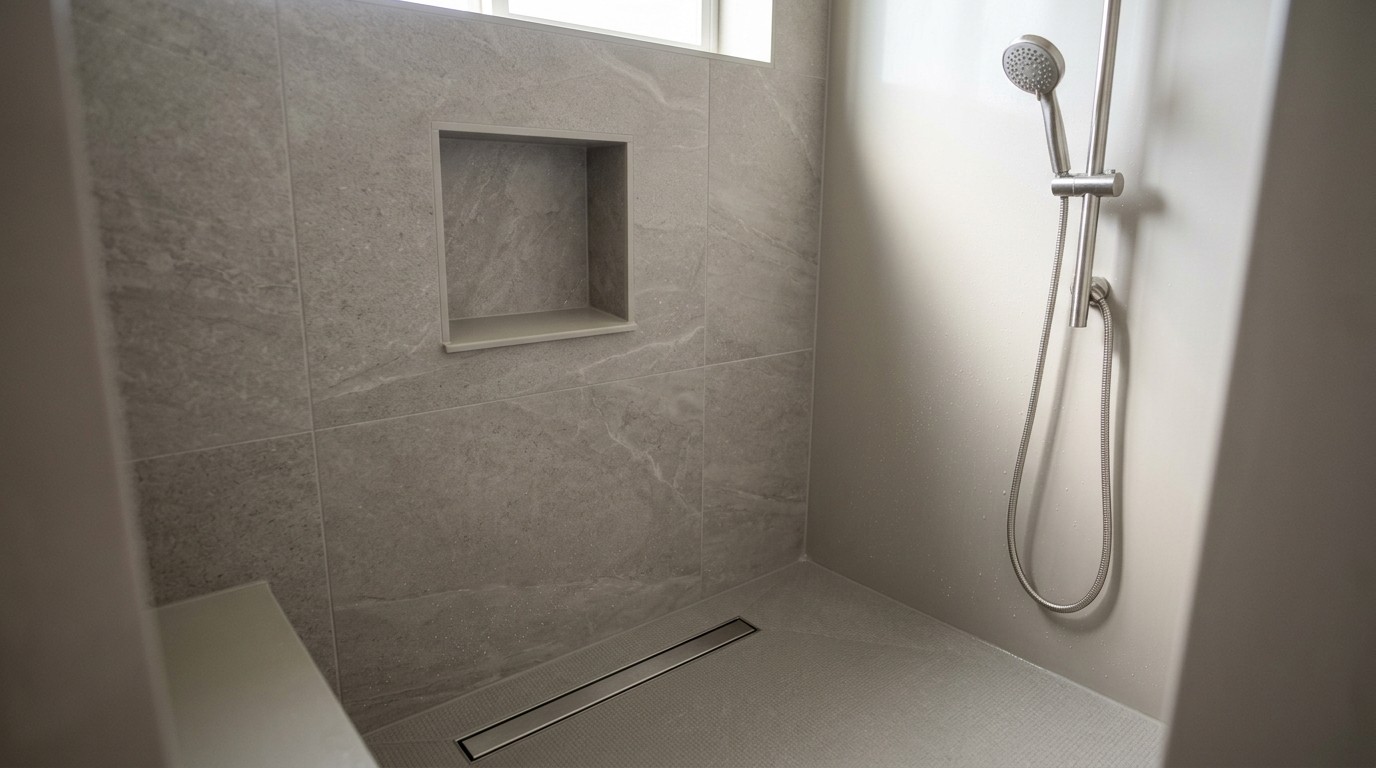
Every surface requires care, but some materials create less work than others. Large-format tile can mean fewer grout lines than a small mosaic layout. Solid-surface shower panels and other low-seam wall options can also reduce the number of joints where soap residue and moisture collect.
Natural stone may need periodic sealing, and glass, polished metal, dark painted cabinetry, and light grout can show water spots or residue more readily. Request written cleaning and maintenance instructions before ordering tile, grout, counters, fixtures, and cabinets. That small step helps prevent a finish from becoming an unexpected weekly chore.
Step 5: Improve Lighting and Visibility
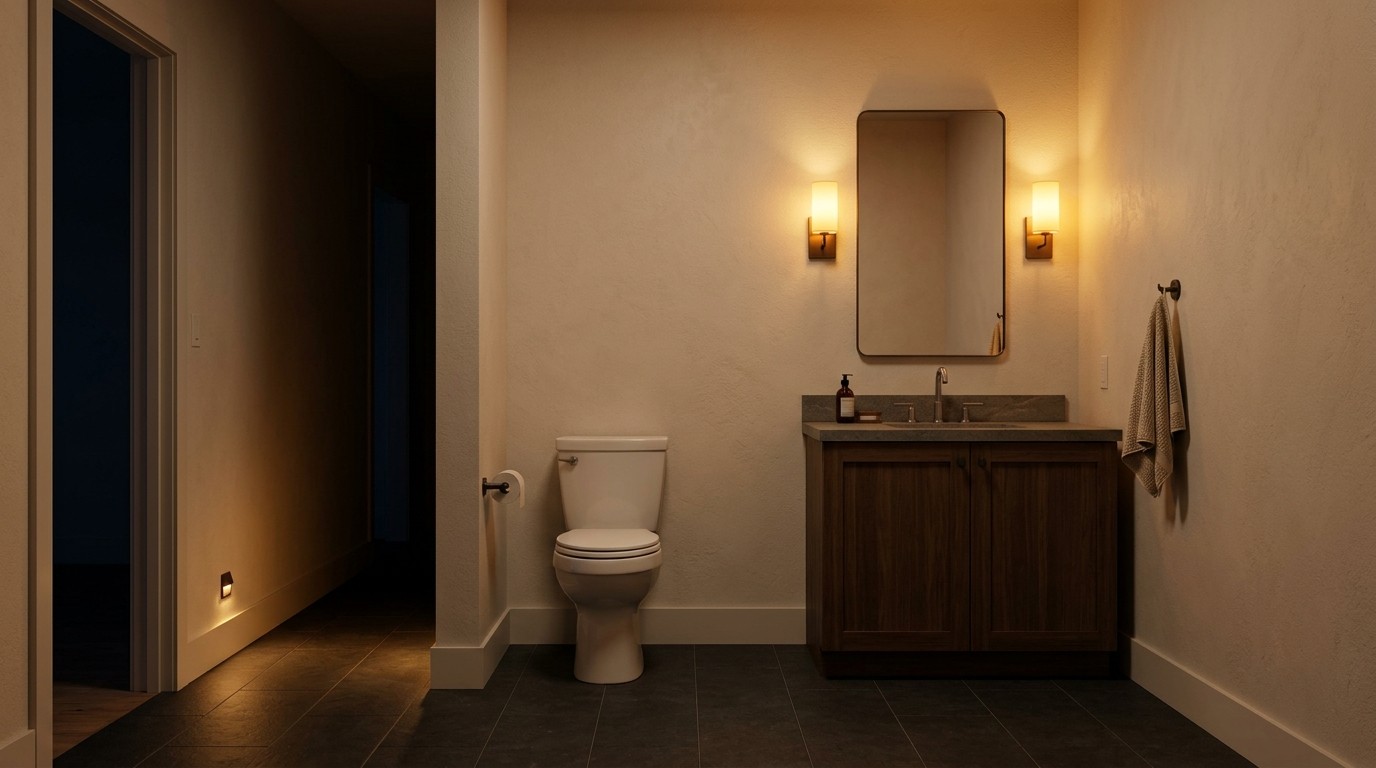
One ceiling light often leaves shadows around the mirror, shower controls, and floor. A layered plan is more useful: general overhead lighting for the room, balanced lighting at the vanity, and properly rated fixtures for wet locations where permitted.
- Place vanity lighting so faces are illuminated evenly for shaving, makeup, and skincare.
- Consider soft nighttime lighting for safer late-night trips.
- Limit glare from mirrors, highly reflective counters, and polished wall tile.
- Locate switches where they can be reached easily when entering the room.
Step 6: Control Moisture With Ventilation and Waterproofing
Hidden water management is one of the most important parts of a remodel. The bathroom ventilation guidance from the EPA emphasizes exhausting humid air directly outdoors rather than into an attic or another enclosed area. The same guidance cites ASHRAE Standard 62.99, which calls for 25 cubic feet per minute from a fan that runs continuously, or 50 cubic feet per minute from a fan switched on and off as needed. Confirm that the fan is operating properly and is appropriate for the room.
Waterproofing should be planned for shower corners, niches, benches, doors, and floor transitions. The shower floor must slope to the drain, and leaks should be repaired quickly. These details protect framing, subfloors, cabinets, and finishes that may be costly to replace later.
Step 7: Add Safety Features Without a Clinical Look
Safety upgrades can fit a contemporary bathroom. Clear floor space, contrast between surfaces, reachable controls, lever handles, and a handheld showerhead can make the room easier to use without changing its style. The CDC’s fall-prevention recommendations also support practical measures such as better lighting, grab bars, and fewer trip hazards.
If grab bars are not needed today, consider reinforcing wall areas during renovation so they can be installed securely later. Keep baskets, cords, scales, and loose rugs out of walking paths.
Step 8: Plan Storage Around Daily Habits
Storage should support the way people actually use the room. Drawers make small items easier to find than deep cabinets. A recessed shower niche keeps bottles off the floor, towel hooks near the shower reduce dripping across the room, and commonly used products stay within comfortable reach.
Step 9: Build a Realistic Remodeling Budget
Finished tile and fixtures are only part of the cost. A complete budget should account for design, demolition, disposal, plumbing, electrical work, ventilation, waterproofing, surface preparation, permits, inspections, labor, cleanup, and possible concealed damage.
- Must-haves: drainage, waterproofing, ventilation, safety repairs, and basic function.
- Useful upgrades: better lighting, storage, shower seating, and easier-access fixtures.
- Wish-list items: decorative accents, premium hardware, smart features, and luxury finishes.
Step 10: Know When to Hire Qualified Help
Professional support is especially important for plumbing relocation, electrical changes, structural repairs, waterproofing, drainage, and shower-glass installation. Ask who will handle permits and inspections, verify licensing and insurance as appropriate, request a written scope of work, and discuss how dust, debris, bathroom downtime, and post-project service will be handled.
Common Questions About Bathroom Remodeling
Is a Walk-In Shower Always Better Than a Bathtub?
No. A walk-in shower may simplify access and cleaning, while a bathtub can remain useful for children, guests, or personal bathing preferences.
Can a Small Bathroom Be Made Safer?
Yes. Better lighting, clearer floor space, reachable storage, secure support, and a lower shower entry can improve comfort without expanding the room.
Do Low-Maintenance Materials Eliminate Cleaning?
No. They can reduce scrubbing and moisture-prone seams, but bathrooms still need routine cleaning, ventilation, and occasional inspection for leaks or failing caulk.
Conclusion
A well-planned Sacramento bathroom remodel should make daily routines safer, calmer, and easier to manage. Start with the people using the room, then connect the layout, shower access, flooring, lighting, ventilation, storage, materials, and budget into one durable plan.

